$85 for new Pearl Izumi Lobster gloves?!? Okay, I loved my old pair but I’m just not willing to part with that much money to keep my hands warm this winter. Truth be told, I suppose they are worth the money. Lobster gloves are the perfect blend between the warmth of a mitten and the dexterity afforded by a pair of gloves. Riding a fixed gear bike though means no gears to shift and only one brake lever to grasp so I can get away with mittens if I want which gave me a great idea. I decided to upcycle my old Louis Garneau jacket into a pair of gore-tex cycling mittens.
My LG Gore-Tex jacket lasted for years! I wore it for my daily commute from October to April for 7 years before bits of the gore-tex began to peel away in some high stress areas, like where my shoulder bag would sit, until I was left with a wet back and shoulders on rainy days. There were of course a few spots that could still hold back the rain and I decided to put them to use. Full disclosure: I never took Home-Ec and have never been taught how to sew, but, like Jeremy Clarkson so often asks on BBC’s Top Gear, “How hard could it be?” 🙂
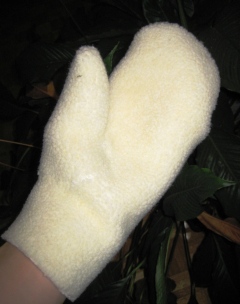
I started with some liners that I made from fleece that I’d picked up at Fabricland. The minimum purchase by the yard will cost about $8 and will get you enough for at least 6 pairs of mittens (if you’re feeling ambitious). What I have here certainly won’t constitute a pattern, but if you decide to give it a try for yourself, just fold the material over your hand and trim off the excess and cut a pac-man for the thumb hole. I’d actually started by making one that turned out a bit tight, so I started over, using it as my pattern. Seen here:
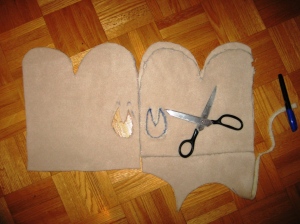
I sewed these by hand, using some extra strength thread and a loop stitch The thumbs were a bit of a pain in the butt to put together. I put my thumb through the hole, folded some material around it, pinned it in place, trimmed the excess and sewed. Voila, liners are complete and are a perfect fit!
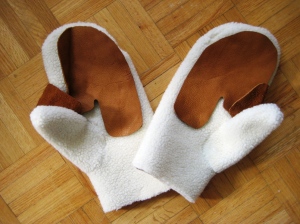
I’ve had some deer hide sitting around for a while that was supposed to go into another project. Instead they became the leather palms for my mitts. Less than 6$ worth. Here they are after being cut for size:
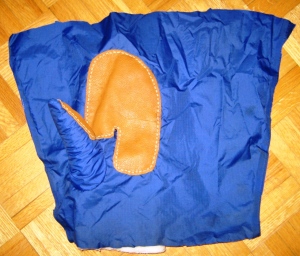
Then it was time to rough cut out the gore-tex covers and complete the thumbs before adding the leather palms. Leather palms do take a while to add. First you need to mark all of the holes with a pin wheel, then punch all of the holes with an awl. Finally saddle stitching them into place with a braided nylon thread will set you back another hour each.
and many hours later:
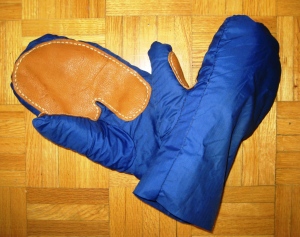
There we have it custom fit, Gore-tex riding mittens with deer hide leather palms. No, the gloves aren’t seam-sealed and they’re not perfect, but they’ll do just fine. I used them last week and they were great. I made the thumbs a bit longer than standard fit so that the tips of my thumbs have a bit of extra space, and gave my fingers a bit of wiggle room as well. They were wind-proof, gripped my bull-horn bars well and were very warm! If winter ever arrives then I’ll be ready, or at least my hands will be warm…


You must be logged in to post a comment.